Having got the faff of our Christmas/New Year trip to the UK out the way, I was finally able to make a start on turning the car into a lean, mean camping machine. After lots of humming and harring we finally settled on the plan of sleeping in the car, as opposed to on top of it in a roof tent. Whilst many people seem to go for the roof tent option, we rejected this in the end for a few reasons:
- We both think we’ll feel more secure in the car with our belongings, than on top of the car
- Sleeping in the car will give us much more flexibility when it comes to stealth camping
- Not having a roof tent will be a huge weight saving
- Not having a roof tent will save us money (around £1000?)
And so it was decided!
After spending many hours researching on various forums (expeditionportal, ih8mud, hubb) and even more time mulling things over in my head, an image slowly coalesced of how the interior was going to be transformed. First I would remove the rear seats; next I would build a raised platform on which we’d sleep and that contained storage underneath in the form of 2 large drawers plus various cubby holes. Not exactly a groundbreaking concept, but fairly ambitious given our resources – no tools and only a small apartment to work in!
Removing the seats was straightforward – 8 bolts to undo and they were out! I was surprised to find that the two halves totalled 40kg – quite heavy. Having removed 40kg, I’m aiming to make my platform weigh about the same – we shall see how that goes. With the seats out I was then able to have a good look at the resulting floor plan – lots of ‘levels’ to work around but, luckily, not too many bulges to worry about (other than the wheel arches.)

Frustratingly, in the UK I have a fairly complete suite of power tools for this kind of job, but here in Japan I’m pretty much at ground zero in the tool department. I was able to bring a few things back with me when returning from our Christmas trip to the UK – my drill-driver being key – but was still short of something to use for slicing up sheets of ply. In the end I splashed out on a very nice cordless Makita circular saw, which I’ll continue to be able to use in the UK, and a dirt cheap jigsaw, which I’ll have to give away as it’ll be useless at home as it needs 100V. A router would also have been useful, but a new one was out of the question and there wasn’t time to wait for the right auction to come up on Yahoo Auctions.
So, with half an idea of the design and various tools in the post, we set off one Saturday morning for the local wood yard. In retrospect I should have done a bit more research here as it came as a bit of a surprise that you can’t buy 2.4m x 1.2m sheets of 15mm and 12mm ply in Japan. In the end I came home with 3 Japan-sized sheets of 12mm ply – like everything else in Japan, even the plywood is smaller! To be honest, I had really been hoping to buy a mixture of 12mm and 15mm to achieve what I felt would be the right balance between strength and weight, so only being able to get 12mm was a bit of a blow. In the end I decided to forge ahead with the materials I had and see how things panned out.
Luckily the arrival of the circular saw coincided with bank holiday Monday and I was able to get cracking….almost. With this being Tokyo we have no outdoor space in which to work so the first task was to empty the kitchen for use as a temporary workshop. With that done I was able to start slicing up bits of ply. Here’s a dry-fit of the bits that will make up the drawer enclosure.
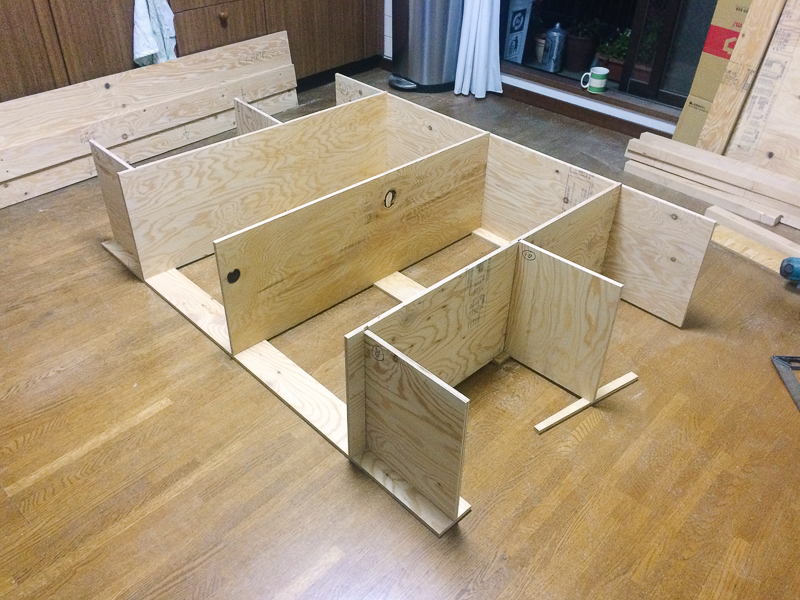
Whilst I had a pretty clear picture in my mind of how the drawers were going to fit together, I was not at all clear how the forward half of the platform was going to work out. Whatever I was going to end up with had to be able to accommodate our fridge, store two 20L water containers, support the combined weight of Clare and I (not at all trivial!), provide storage space for other random crap and hopefully not fall apart after a couple of months.
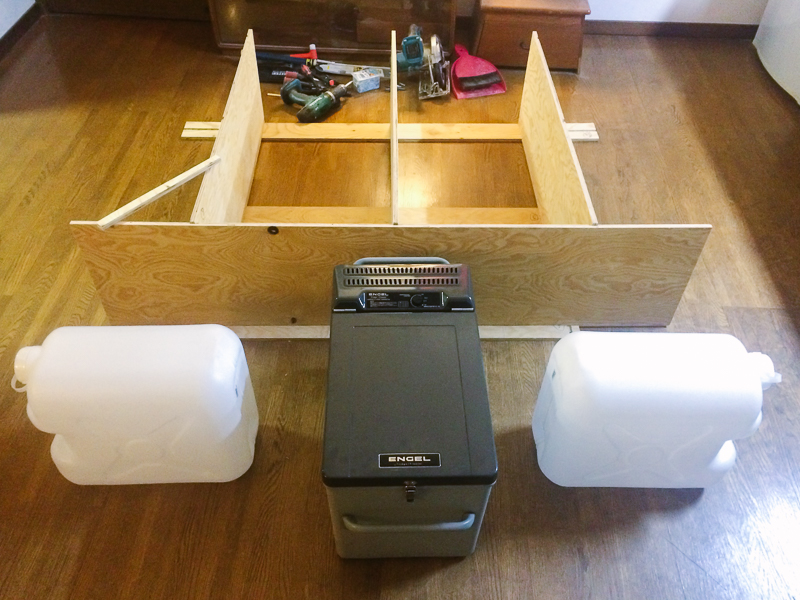
After failing to come up with anything I was happy with using pencil and paper I got the drawer carcass screwed together, fitted it in the car and spent some time scratching my head trying to decide what the best solution was going to be.
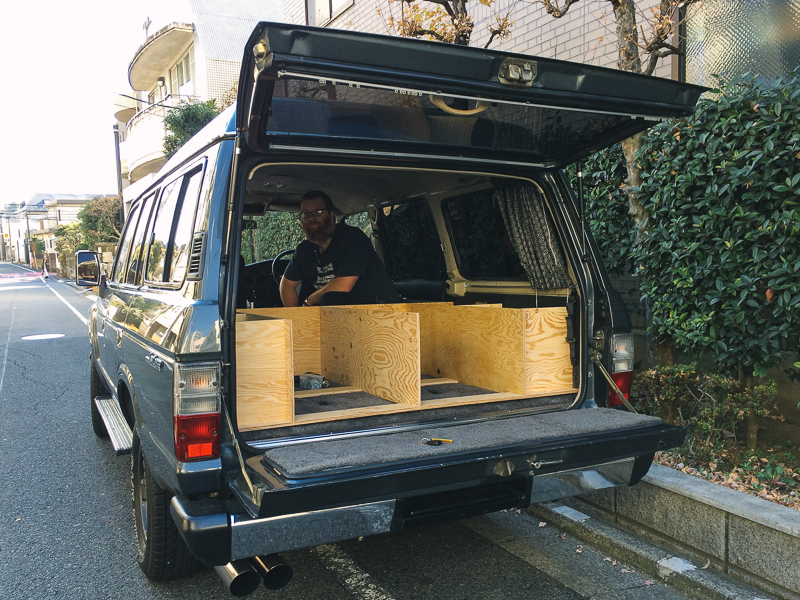
The head scratching didn’t really help and I ended up feeling pretty conflicted about whether to continue the plywood ‘fin’ idea all the way through to the front seats, or switch to using 35mm x 45mm timber to make a stud work frame. Finally, in the interests of actually making some progress, I made a choice and went with the stud work idea on the basis that I know it will be strong enough to support us and the fridge and that it will be easier to integrate into the varying floor heights. I’m not massively happy I’ve made the right decision, but there you go.
So, with that decision made, the cutting of half-lap joints has begun in earnest…. all being well, next weekend I should be able to start dry-fitting the front section in the car and see how it’s all coming together.

Part 2 can be found here…
I think that looks like a pretty sensible solution! Well done for going it in your little kitchen – although imagine doing that in our boat!!
Yep – slowly coming together… I don’t think I’d enjoy working in a narrow boat!