This post is the follow-up to Vehicle electrics: Design….. and I’m afraid it’s going to be equally boring! More of a reference for others trying to solve the same problem, than swash-buckling tale of international travel.
In this post, I’m going to concentrate on the bit that lives under the bonnet….
As the person responsible for the ‘installation’ there were a few questions that immediately popped into my mind:
- Where do I put the sodding second battery?!
- Where do I put the other under-the-bonnet components (circuit breakers + isolator) and how do I mount them safely to the car?
- How do I wire it all together?
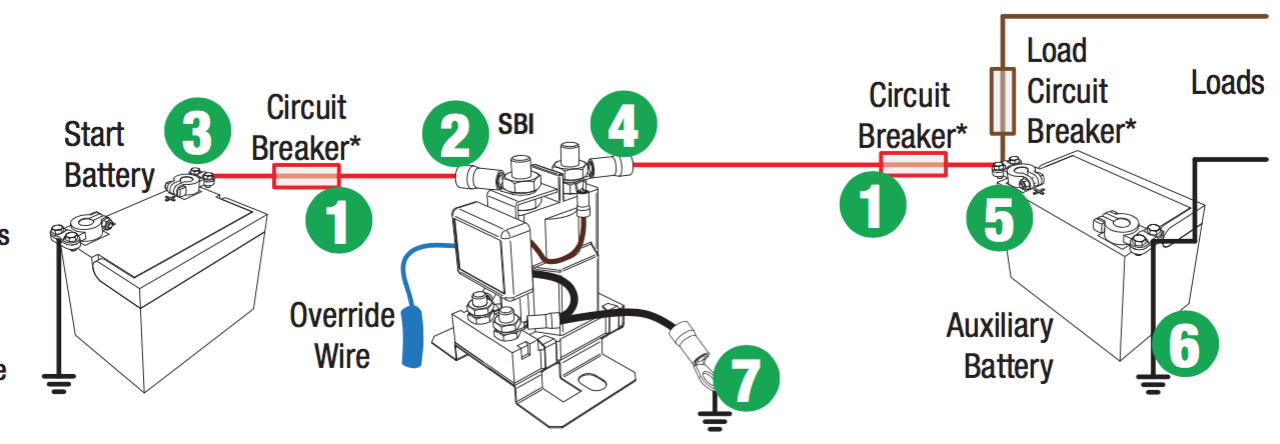
Just to get us all on the same page, here’s the target circuit for the second battery, isolator and circuit breakers.
As it turns out, the problem of locating the second battery was fairly straightforward. Diesel Toyota ’60’s are 24V and therefore fitted with two 12V batteries as standard. Our petrol ’62 only requires a 12V system but as it shares the same bodywork with the diesel it already comes with the appropriate holes to mount a second battery – thank you very much Toyota! A very nice man called Noel, from America (stainlesstrays.com), makes excellent battery trays that bolt directly into the spare holes.
Unfortunately, it’s not all sweetness and light as the Toyota Gods saw fit to fill the void where the extra battery could have gone with other bits and pieces. Our ’62 has a ‘3-FE’ engine, so the void is occupied by the ‘air pump silencer’ and the radiator’s ‘overflow bottle’.
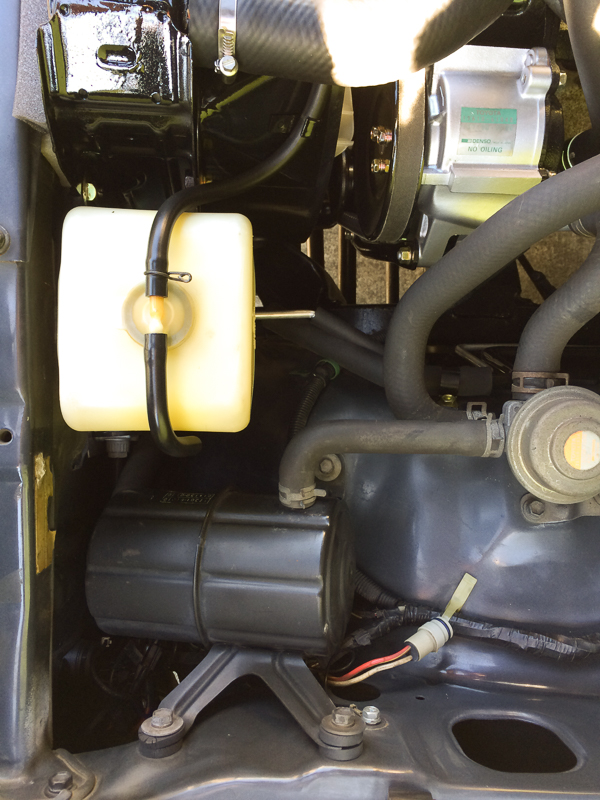
With the offending parts temporarily removed, the installed battery tray looks very neat indeed.

So what to do?
After a few hours poking around on ih8mud, I concluded that many people had removed the silencer with no detremental effect – so that’s what I did! It will get sent back to England with the rest of our belongings just in case I need it in the future.
That still left the problem of the overflow bottle, which is a very necessary part of the car! In the end, I made a little steel bracket and attached the bottle to the new battery tray. If I had half a brain I would’ve explored the Stainless Trays website a little more deeply and seen that they already sell a bracket that does much the same thing. Great minds and all that…..

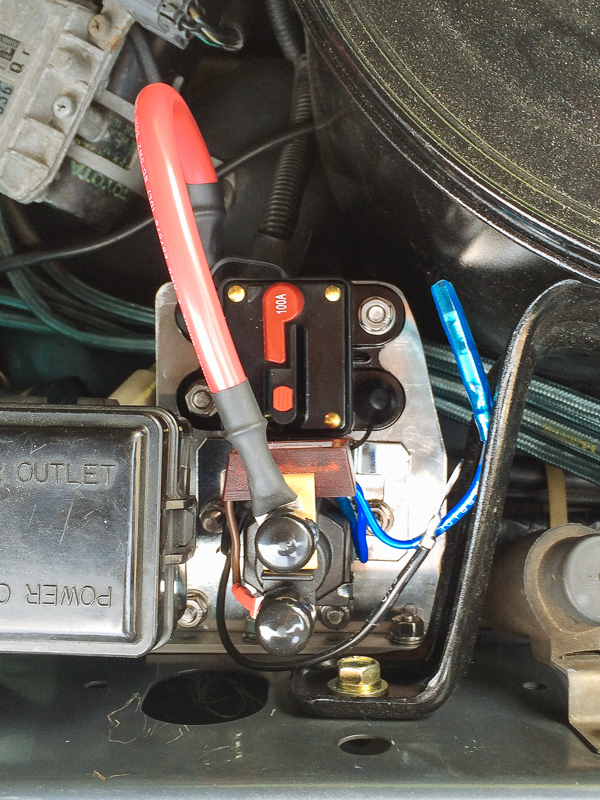
With the battery settled in it’s new home, that left the isolator and the 2 breakers (one breaker between the main battery and isolator and the other between the isolator and second battery.) By the power of the craft section at our local Tokyu Hands store I was able to purchase some small sheets of steel, from which I very crudely fashioned a couple of mounting plates. The plates look ugly as hell but, amazingly, seem fit for purpose.

With all the bits in place, all that remained was to wire it all up. It took a while to find somewhere from which I could buy the thick 25mm2 cable I needed, but after many hours on the ‘net I eventually found a marine shop in Yokohama who carried it. The rest of the bits (terminations, breakers, heat shrink) came from UK-based 12 volt planet. Best of all I got to buy a new tool – a pneumatic crimper! This came from ebay.

With this tool I’m able to very securely crimp the correct appropriate termination once I’ve cut the cable to length, like so.
With everything wired up, testing of the new system went well. I fired up the engine and after a couple of seconds the isolator engaged and the second battery started to charge. After switching the engine off I waited for the voltage in the system to hit 12.7V (I had to turn the lights on to make this happen), at which point the isolator disengaged and the 2 batteries become electrically isolated.
Next job is to get the fridge, invertor and power points connected up to the second battery, then get some camping done to test everything out!
The tale continues in Part 3.
That’s pretty much exactly how I would have done it.
You know what Uncle Chris, I always feel a lot happier once I get your seal of approval!
You’ll be excited to hear there’ll be a part 3 coming sometime soon….
Mark, my old 1993 Troopie and my current Hilux (both diesel) have factory ready to go spaces under the bonnet for second auxiliary batteries. Your model I don’t know about though!! Ian
Our car has a factory ready space… but as it’s the last model in the series, that space has been encroached on by a couple of other bits and pieces. All sorted now though 🙂
So now I know what to get Jim for Christmas…a pneumatic crimper!
You mean he doesn’t already have one?!?