For a bit of practice video editing I cut together some of the video we shot on our practice camping trips in and around Japan.
Locations include Tokyo, Saitama, Okayama, Sagaminohara, Boso Peninsular.
Filmed on a hodgepodge of DSLR, GoPro and VHS.
Taking the long way home from Japan to Frome, UK
For a bit of practice video editing I cut together some of the video we shot on our practice camping trips in and around Japan.
Locations include Tokyo, Saitama, Okayama, Sagaminohara, Boso Peninsular.
Filmed on a hodgepodge of DSLR, GoPro and VHS.
Having worked up a design and installed the battery, isolator and circuit breakers I managed to get the last few bits finished off over the last few weeks.
Inside, the plan was:
• 12V to power our fridge
• 3 x 5V USB outlets
• Mains power via a 300W inverter
• A meter to monitor the battery’s voltage
All this will be powered by an Optima YTS4.2L deep cycle battery capable of delivering 55Ah. Theoretically, this should mean a couple of days of refrigeration without having to worry about charging the battery.
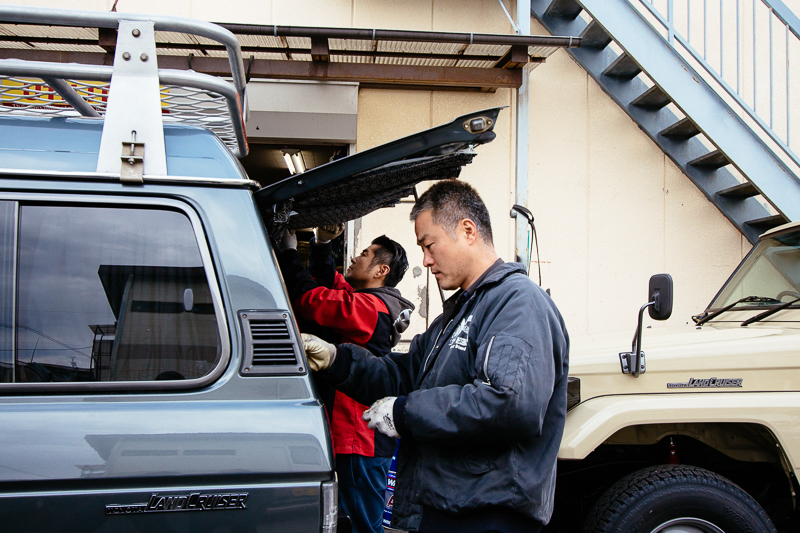
So having bought a 4WD car we thought it might be a good idea to make sure that the 4WD actually works. We had obviously tested that the switch worked but hadn’t taken Totty over anything higher than the odd kerb or two. After a bit of internet research we found a 4WD centre just an hour or so from Tokyo. We decided to book a place and also to take advantage of the camping that they offered too. The place is called Bronco (ブロンコ) (http://www.bronco4x4.net).

Japanese is a cool language – it looks good, it’s fun to learn and it’s what they speak in anime – but unfortunately virtually no-one outside of Japan speaks, reads or writes Japanese. On that basis, when you plan to take a Japanese car out of the country, a little bit of preparation is required to ensure that you have the relevant documentation in a form that can be read by the rest of the world. The following bits and pieces are required:
This post is the follow-up to Vehicle electrics: Design….. and I’m afraid it’s going to be equally boring! More of a reference for others trying to solve the same problem, than swash-buckling tale of international travel.
In this post, I’m going to concentrate on the bit that lives under the bonnet….
As the person responsible for the ‘installation’ there were a few questions that immediately popped into my mind:
Months and months ago we set our hearts on the idea of fitting an awning to the car – for relatively little weight we will always have near-instant access to our very own shelter from either the sun or rain.
After a bit research we also set our hearts on the 2m long ARB model – it looked good and every review was glowing. And that was were we hit the problem – we could not find anywhere to buy this thing locally! To cut a very long and arduous story short, we eventually imported our awning from America incurring a huge postage cost! Luckily it arrived safely in the last week. And today I had some time spare to have a go at attaching it to the car!
Once again my friend Ollie was able to help out – there’s no way I could’ve got this thing fitted on my own, both in the brawn and brain department – so a big thank you to him!
As usual we were stuck doing the job on the side of the street.

As is always the way with me, I ended up spending an inordinate amount of time procrastinating over whether or not we needed to add additional electrics to the car. Our needs are pretty basic:
I tried pretty hard to convince myself that we could get by using the main car battery to power all of this lot, but in the end I couldn’t shake the vision of settling down with the laptop for the evening and accidentally leaving it on only to find us with a flat battery the next morning; unable to start the car; on a deserted steppe in Mongolia. We would be literally f*#k*d.
So we needed a second battery, and all the paraphernalia that comes with it…..
So, as usual, that early morning set-off didn’t happen until 1.30pm! A combination of coffee and croissants and finding out the roof rack had arrived delayed ‘kick off.’ Nevertheless, good to get the roof rack on – though we both think it slightly distracts from her drop-dead good looks. We also replaced the two dampers that hold the tailgate up as the old ones had lost their oomph.
Having bored people rigid with Parts 1, 2 and 3, I’m feeling slightly loathed to write a part 4. However, the job is now largely complete so, in the interests of closure, here’s the last instalment. I’m going to keep it short, though….
Having bought more wood, I spent my bank holiday Thursday making the second drawer, this time adding 2 dividers in to the mix.
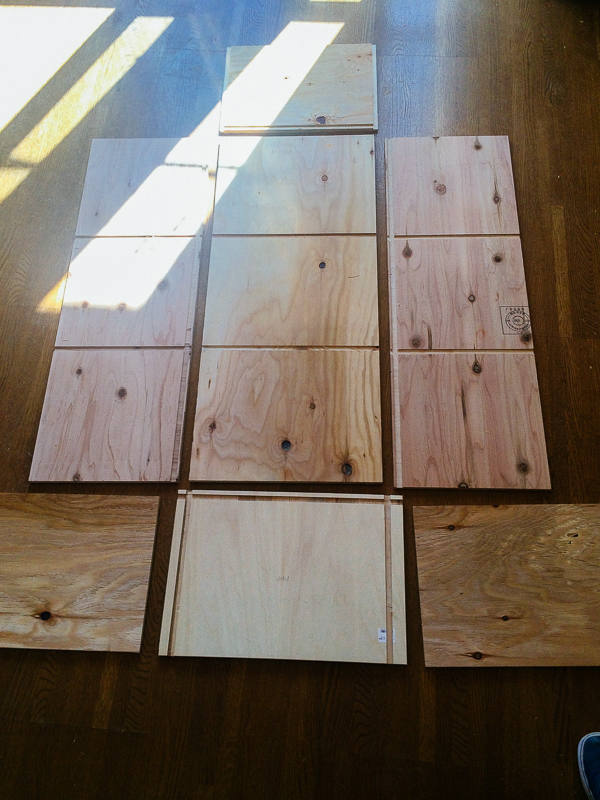
The saga continues! Catch up on pt 1 here and pt 2 here.
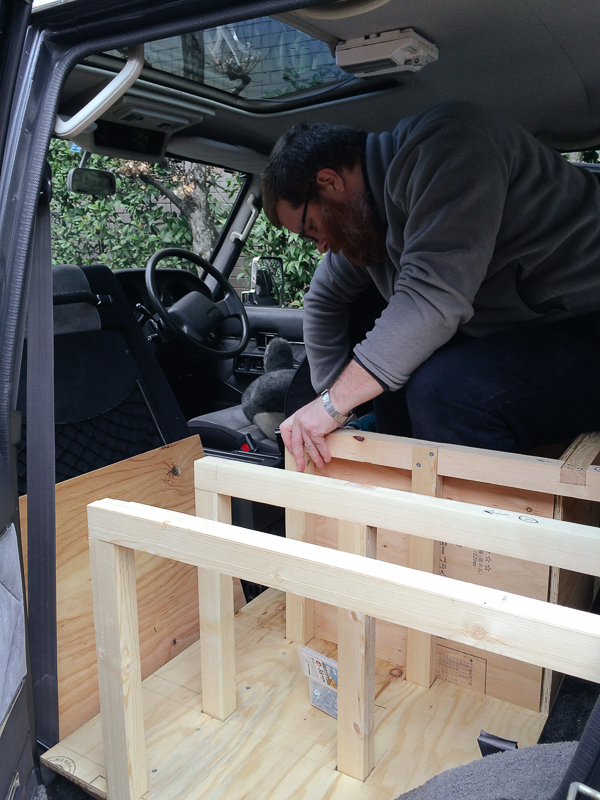
After one and a half weekends-worth of prepping, measuring and cutting, it was good this weekend to finally start putting the sleeping platform together. First task of the day, though, was to cut a couple of access holes for storage spaces that will only be accessible from the top. In several people’s designs on the ‘net, they add fancy hinged doors or removable panels but I’ve just left the holes open assuming our mattress won’t sink into them. I also cut a couple of slots into the top platform that we’ll use for the drawers to lock into.
© 2026 Fromeward Bound
Theme by Anders Noren — Up ↑
Recent Comments